In XperienCentral, sometimes a modification is not immediately visible on the website frontend. Oftentimes this is because the page on which change occurred has not been updated in the cache. While the cache is useful for performance reasons, it can unfortunately also prevent modifications from becoming immediately available. In this tips & tricks article, we will show you how easy it is to add a modification to the cache.
Caution: the tips explained in this article are simple to perform but must be carefully thought out and executed. Any small mistake or unnecessary change to a timestamp can have undesired consequences.
Solution: resetting the timestamp
You can introduce modifications to the cache by resetting the timestamp of the page(s) that have been modified. The next time that the page is requested, XperienCentral will check to see whether the page’s timestamp is newer than the timestamp that is stored in the cache. This being the case, XperienCentral will schedule the newer version of the page to be updated in the cache (this will happen in the background). The second time that the page is requested, the newest version of the page will be returned and it will be updated in the cache.
1) Modifications to one or two pages
If you have modified one or two pages, it is recommended that you only update the timestamp for the specific page(s). Perform the following steps:
- Navigate to the page you have modified.
- Click Edit in the Properties widget.
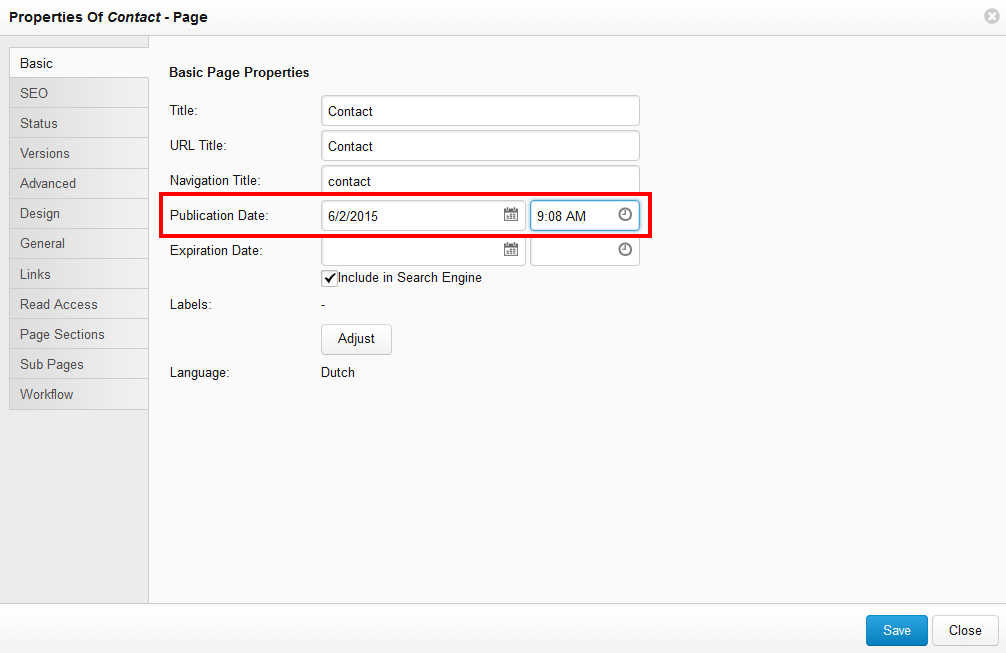
- Navigate to the [Basic] tab and advance the Publication Date by one minute.
- Click Save.

2) Modifications to multiple pages
Suppose you add a Twitter logo to a page section together with social media buttons that will be displayed on every page of your website. In this case, you wouldn’t want to have to manually change the timestamp for every page in order to update the cache. For changes to multiple pages, it is easier to change the general timestamps for every page on the website. To do so, follow these steps:
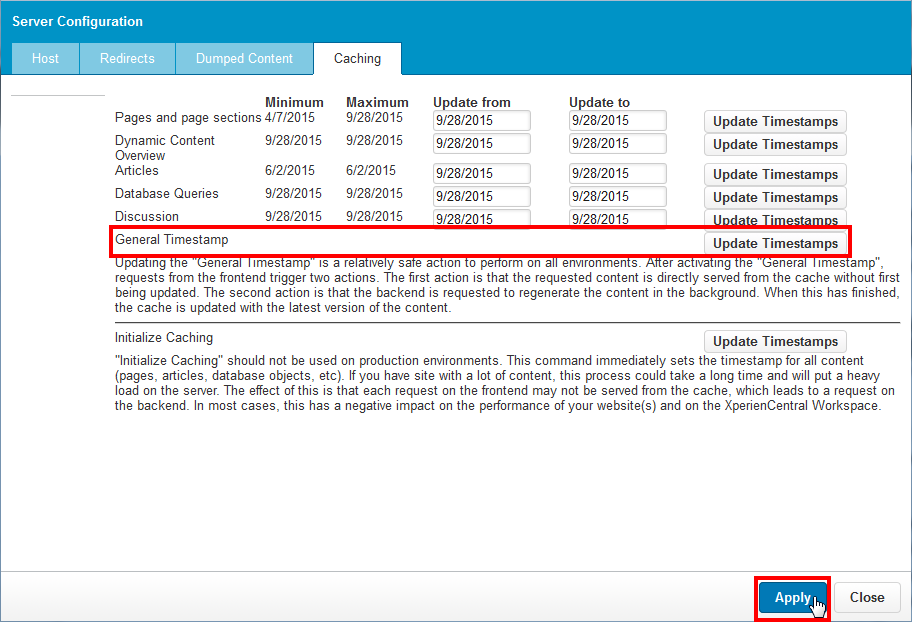
- Navigate to Configuration > Server Configuration > [Caching].
- Click [Update Timestamps] next to “General Timestamp”.
- Click [Apply].

Note: Resetting the general timestamp for a website that contains dozens or hundreds of pages can have a temporary effect on the performance of the frontend. This operation should only be performed when you have made a change that affects the majority of pages on your website.

Comments
0 comments
Article is closed for comments.