In the XperienCentral Workspace, you can come across all sorts of content: content that is live (published), content that has fallen offline (expired), and content that has yet to be published (planned).
Sometimes it would be nice to see the website as the visitor sees it, that is, only the content that at a given time is live. That moment doesn’t necessarily have to be the present time (what does the visitor see on the site right now?). It is also handy to look back in time to see, for example, which banner were we using for last winter’s campaign? And just as useful, to look forward to the future (is the new campaign for next week properly set up?).
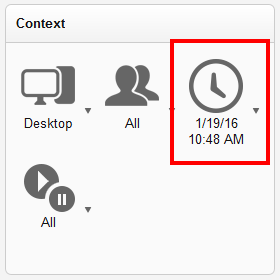
For these situations, you can use the “Time” functionality available in the Context widget (see figure 1). In this way you can journey through time in XperienCentral.

Figure 1. The Context widget.
1. Set the date and time
Choose the moment in time for which you want to view only the published content on the website, for example February 3, 2016. Do so as follows:
- Open the Context widget.
- Click the clock icon to display the date and time selector.
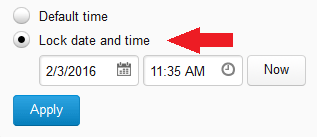
- Select the option “Lock date and time”.
- Click the calendar icon and select the date.
- Click the clock icon and select the time.
- If you want to view the website as it appears at the present time, click [Now].
- Click [Apply].

You can now inspect the site and see the content that will be or was visible at the selected time, in this case February 3, 2016. XperienCentral takes into account the workflow and publication status of all content items, therefore a content item with the workflow status “planned” will only be visible if it will be published on a date and time before the date and time you define.
Note: When previewing the website at a time in the future or in the past, you may see the following message when selecting a content item:

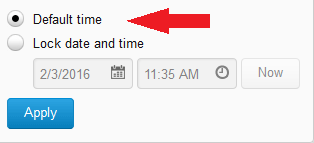
This message indicates that the content item will not be or was not available on the date and time you defined. Don’t interpret this message to mean that the content item is not visible at the present time: remember, you are viewing the website at a time in the past or future. If you want to view the content item, set the date and time to the default time (now), assuming of course that the content item is currently published:
2. Default time

When you are finished viewing the website at a time in the past or future and want to return to the present state, follow these steps:
- Open the Context widget.
- Click the clock icon.
- Select “Default time”.
- Click [Apply].
You are now viewing the website in edit mode which means you see all content items, those currently published, those in a planned state, and those in an expired state.
Notice also that when you are working in the default time, the date and time shown in the Context widget can change. This is necessary because planned content items and those that expire with the passage of time would otherwise not be visible. See for yourself:
- Open a published content item and the date and time in the Context widget is the current moment.
- Open a planned content item, one that will be published on, for example, September 18, 2016, and the date/time in the Context widget will be one minute after the date and time of the planned publication (September 18, 2016).
- Open a content item, one that expired on, for example December 13, 2015, and the date/time in the Context widget will be one minute before the date and time of the expiration date (December 13, 2015).
Note: In order to avoid confusion, the Site Structure and Page Section widgets do not change as a result of changing the date/time in the Context widget. These widgets always show all content items regardless of their workflow state.
Comments
0 comments
Please sign in to leave a comment.